A failing lawn can be turned around in a single growing season — and knowing how to fix a bad lawn comes down to doing the right things in the right order. Sequence matters more than effort here. Most lawn renovation failures happen because homeowners skip steps or reverse them, not because they didn’t work hard enough. This guide walks you through six steps: assessing what you’re working with, deciding whether to repair or start over, preparing the ground, choosing the right grass, seeding correctly, and watering through establishment. Follow the process and your lawn can go from bare and patchy to recovering turf within one season.
Assess Your Lawn Before You Start Fixing It
Before you spend a dollar or move a muscle, take 15 minutes to triage what you actually have. This assessment drives every decision that follows. You need three specific pieces of information.
1. How Much Live Grass Remains
Walk the entire lawn and estimate what percentage still has viable, green grass versus bare soil, dead material, or weeds. Be honest — it’s easy to overcount surviving turf.
- Less than 30–40% bare or damaged: Spot repair is likely the right path.
- More than 40–50% bare, dead, or weed-dominated: Full renovation will produce better results than trying to patch around the problem.
This single number is the most important factor in Step 1.
2. Whether Soil Compaction or Thatch Is Present
Take a flathead screwdriver and push it into moist soil. If it doesn’t slide in 6 inches without significant force, you have compaction. Compacted soil repels water, suffocates roots, and will undermine any seeding effort if you don’t address it first.
Also check the thatch layer — the spongy layer of organic material between the grass blades and the soil surface. Run your fingers through the base of the grass. If that layer is more than half an inch deep, it’s acting as a barrier between seed and soil.
3. Whether Weeds or Pests Have Taken Over
If weeds make up a large percentage of what’s green in your lawn, you need to deal with them before doing anything else. Overseeding into a weed-dominated lawn is not a renovation strategy — the weeds will win. Similarly, if you notice large irregular dead patches with no obvious drought or wear pattern, grub damage or fungal disease may be active. Resolve pest issues before seeding or you’re planting into a problem that hasn’t been fixed.
Step 1 — The First Decision in Fixing a Bad Lawn: Repair or Full Renovation
This is the fork in the road. The assessment above tells you which path to take.
Spot Repair
If less than 30–40% of your lawn is damaged or bare, spot repair is the right call. You don’t need to touch the rest of the lawn — just identify the problem areas, prepare those specific patches, and reseed or resod them. This targeted approach makes sense when the majority of your turf is still intact and healthy. It’s faster, cheaper, and less disruptive than a full renovation.
Full Lawn Renovation
If more than 40–50% of the lawn is bare, dead, or dominated by weeds, starting over produces more reliable results than trying to overseed around the damage. This is a lawn renovation from scratch, and the right mindset is to treat it as a fresh start rather than a rescue operation. Fixing a bad lawn at this scale requires committing to the full process — not just throwing seed down and hoping for the best.
The Kill-and-Restart Method for Weed-Dominated Lawns
When weeds have taken over, you cannot simply overseed on top of them. Established weed root systems and dense canopy give weeds a competitive advantage that new grass seed cannot overcome — the seedlings get outcompeted before they have a chance to establish.
The solution is a non-selective herbicide applied to the entire area. Non-selective means it kills everything it contacts — weeds, remaining grass, and any other vegetation. Glyphosate-based products (sold under names like Roundup or various store brands) are the standard choice for this application. Apply according to label directions, then wait approximately two weeks before doing any ground preparation or seeding. That waiting period allows the herbicide to work through the root systems and break down enough that it won’t interfere with new seed.
This isn’t a drastic move — it’s a clean slate. Two weeks of waiting is far less costly than reseeding into weeds and losing a full season.
Product note: A ready-to-use glyphosate spray works well for smaller areas. For larger lawns, a concentrate mixed with water in a pump sprayer is more economical. Follow all label directions and observe any re-entry or reseeding waiting periods listed on the packaging.
Important timing note: Full renovation timing must align with your grass type’s peak growing season. That’s covered in Step 3. Review our warm or cool season schedules before you commit to a start date — getting the season wrong is one of the most common reasons a lawn renovation from scratch fails.
Step 2 — Prepare the Ground Before Reseeding (This Is Where Most Lawn Fixes Fail)
This is the most skipped step in any lawn repair guide, and it’s the most consequential one. Grass seed needs direct physical contact with soil to germinate reliably. Seed scattered over thatch, dead grass, or compacted ground has low germination rates regardless of seed quality. You can buy the best grass seed on the market and waste it entirely if you skip ground preparation. If you’re serious about fixing a bad lawn, this step is where that commitment shows.
Work through these substeps in order.
1. Mow Short and Rake Out Dead Material
Set your mower as low as it will go and cut the entire area. Then rake out dead grass, clippings, and any loose debris. The goal is to reduce the thatch layer and expose as much soil surface as possible. Don’t skip the raking — dead material left in place creates a barrier between seed and soil.
2. Dethatch If the Layer Is More Than Half an Inch Deep
If your thatch assessment showed more than half an inch of spongy material, remove it before seeding. For small areas (a few hundred square feet), a dethatching rake — a stiff, tined rake designed to pull up thatch — gets the job done. For larger areas, rent a mechanical dethatcher (also called a power rake or vertical mower) from a hardware or equipment rental store. It’s faster and more thorough than doing it by hand.
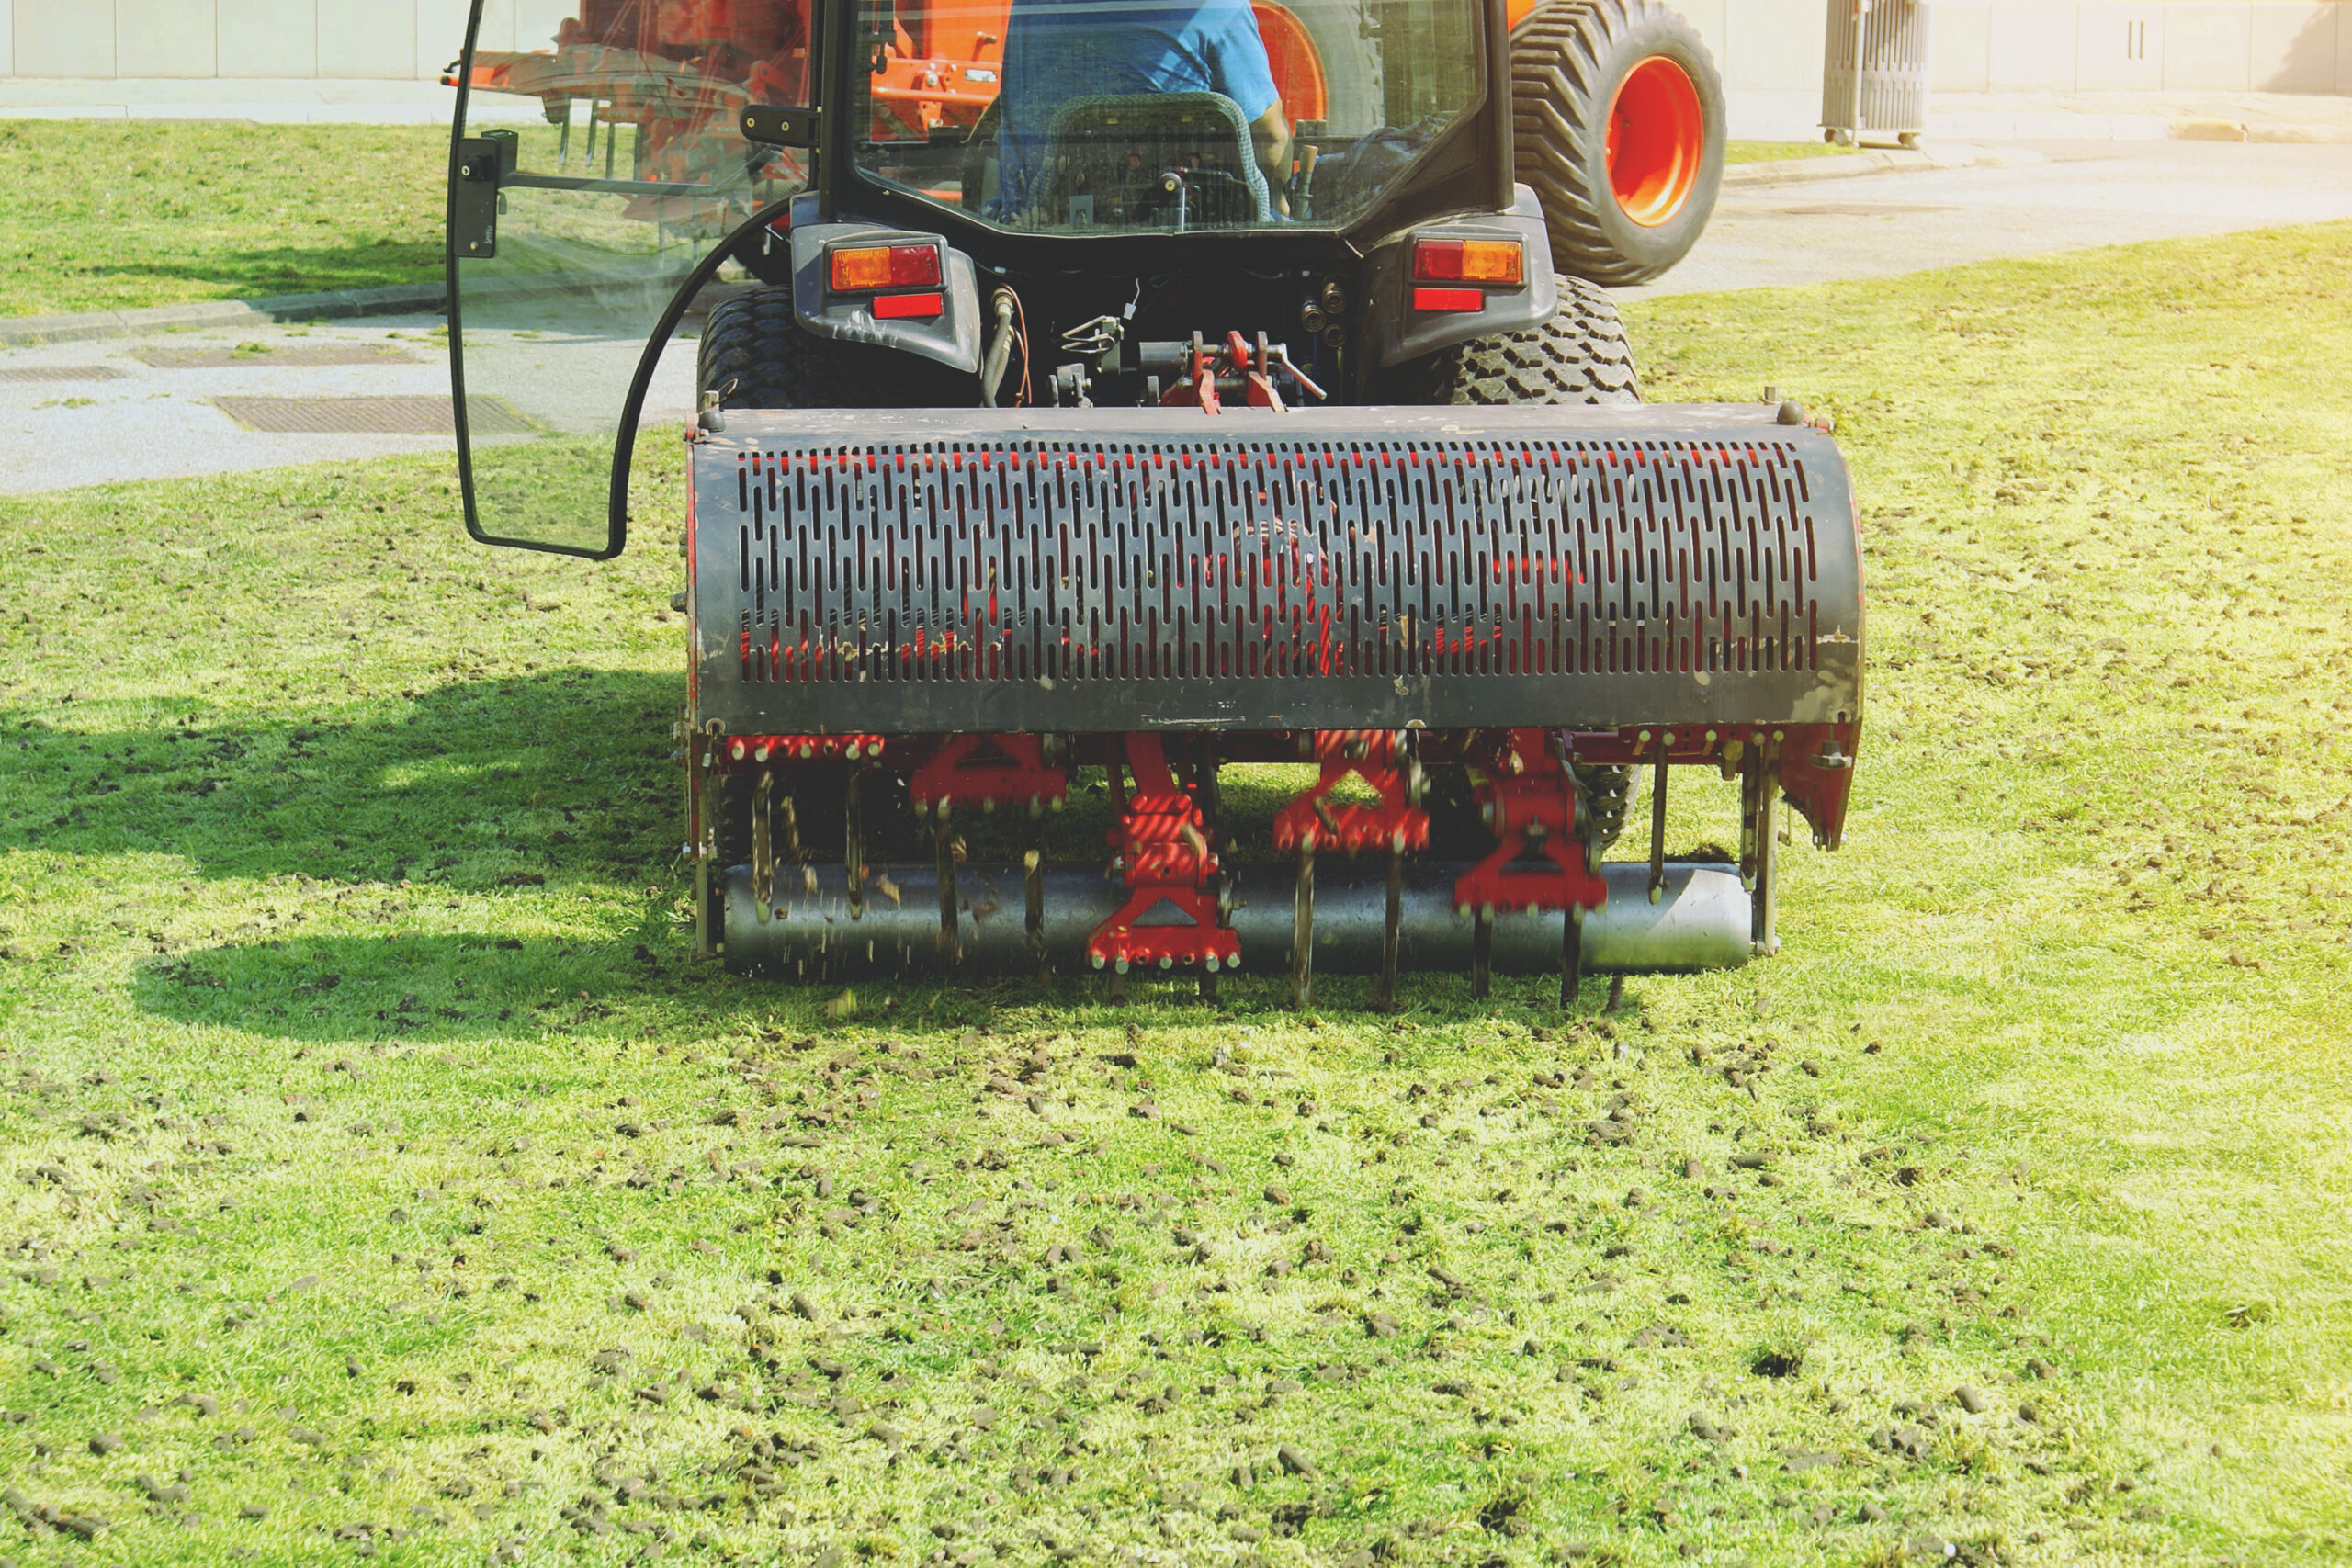
3. Core Aerate Compacted Soil
Core aeration uses a machine to pull small cylindrical plugs of soil out of the ground, creating open channels throughout the lawn. These channels allow seed, water, oxygen, and nutrients to reach the root zone instead of pooling on a hard surface. Seeds that fall into aeration holes germinate at significantly higher rates than seeds left on a compacted surface.
Core aerators are available to rent at most hardware stores and equipment rental centers for $50–$80 per day — this doesn’t need to be a purchase. Leave the soil plugs on the surface; they’ll break down within a week or two.
4. Test Your Soil
If you haven’t tested your soil in the past two years, do it now — before you add anything. Grass growing in the wrong soil pH will struggle even with perfect seeding and watering. Most cooperative extension offices (run through state land-grant universities) offer low-cost or free soil testing, and results usually come back within a week or two. A basic home soil test kit can also give you a usable pH reading quickly.
The target pH range for most grass types is 6.0 to 7.0. The test will also flag major nutrient deficiencies, particularly phosphorus, which is important for root development in newly seeded lawns.
Product note: If you want results before your extension office can turn them around, an at-home soil test kit — available at most garden centers and online — can give you pH and basic nutrient readings within minutes.
5. Amend Based on Test Results
Amend the soil before seeding, not after. Amendments mixed into or applied to the surface now have the best chance of influencing soil chemistry by the time new roots start developing.
- Low pH (below 6.0): Apply lime to raise pH. Pelletized lime is easier to spread than powdered.
- High pH (above 7.0): Apply elemental sulfur to lower pH.
- Poor soil structure or very low organic matter: Spread a thin layer (¼ to ½ inch) of compost over the surface and rake it in lightly.
Don’t guess on amendments. Adding lime or sulfur without knowing your actual pH can make the problem worse.
Step 3 — Choose the Right Grass for Your Region (A Commonly Overlooked Part of Any Lawn Fix)
Selecting the wrong grass type is one of the most reliable ways to fail at lawn renovation. Climate determines which grasses can thrive, and planting outside those parameters wastes your seed investment. This step is critical whether you’re doing a minor lawn repair or a complete renovation from scratch.
Warm Season Grasses
Types: Bermuda, Zoysia, St. Augustine, Centipede Best regions: USDA hardiness zones 7–10 (the South, Southeast, Southwest) Renovation window: Late spring to early summer, when soil temperatures are consistently above 65°F Why: These grasses grow aggressively in summer heat and go dormant in cold temperatures. Planting before the soil warms means slow germination and high seedling vulnerability. If you’re trying to fix a bad lawn with a warm season grass, timing this window correctly makes a significant difference in first-season results.
Cool Season Grasses
Types: Tall fescue, Kentucky bluegrass, perennial ryegrass Best regions: USDA zones 3–7 (the North, Upper Midwest, Mountain West, Pacific Northwest) Renovation window: Late August through October — late summer to early fall Why: Cool season grasses germinate best when daytime temperatures drop into the 60s but soil is still warm from summer. Spring planting is possible but puts seedlings under summer heat stress before they’ve fully established.
The Transition Zone
The transition zone runs roughly along the I-40 corridor and through the mid-Atlantic states. Both warm and cool season grasses can survive here, but with real tradeoffs. Cool season grasses struggle in the intense summer heat; warm season grasses go dormant and brown during winter. Grass type selection in this zone becomes a judgment call based on how much winter dormancy you can tolerate versus how well the lawn needs to perform in peak summer heat. Tall fescue is often the most practical option in the transition zone because it tolerates both heat and cold better than Kentucky bluegrass or perennial ryegrass. Local extension services can advise on what performs best in your specific county.
Step 4 — Seed, Sod, or Sprig the Right Way
With the ground prepared and grass type selected, it’s time to establish new turf. Choose your method based on budget, grass type, and how quickly you need results. This step is where the work of fixing a bad lawn becomes visible — but it only pays off if the prior steps were done correctly.
Seeding
Seeding is the most affordable approach for most homeowners working through a lawn renovation step by step. Use a broadcast or drop spreader for even coverage — hand-spreading leads to patchy results. Apply seed at the rate listed on the bag for new lawn establishment (typically higher than the overseeding rate).
After spreading, lightly rake the seed into the soil surface so it makes good contact. Seed sitting on top of loose debris won’t germinate reliably. For large bare areas, a thin topdressing of compost or starter soil mix applied over the seed improves moisture retention and germination rates.
Product note: Look for a starter fertilizer when you buy your grass seed. Starter fertilizers are high in phosphorus, which supports root development in new seedlings. Apply at seeding — it’s one of the few times a phosphorus-heavy fertilizer is specifically appropriate for lawns.
Sod
Sod gives you near-instant results and is more forgiving of timing than seed. It costs significantly more, but for high-visibility areas or situations where you need ground covered quickly (to prevent erosion, for example), it’s worth considering. Prepare the ground exactly the same way you would for seeding — sod laid on compacted or thatchy ground will fail to root properly.
Sprigs and Plugs
Used primarily for warm season grasses like Zoysia and St. Augustine, which don’t spread reliably from seed. Sprigs (grass stolons) or plugs (small sections of established turf) are planted into prepared ground and spread over time. This method is slower than sod but costs less.
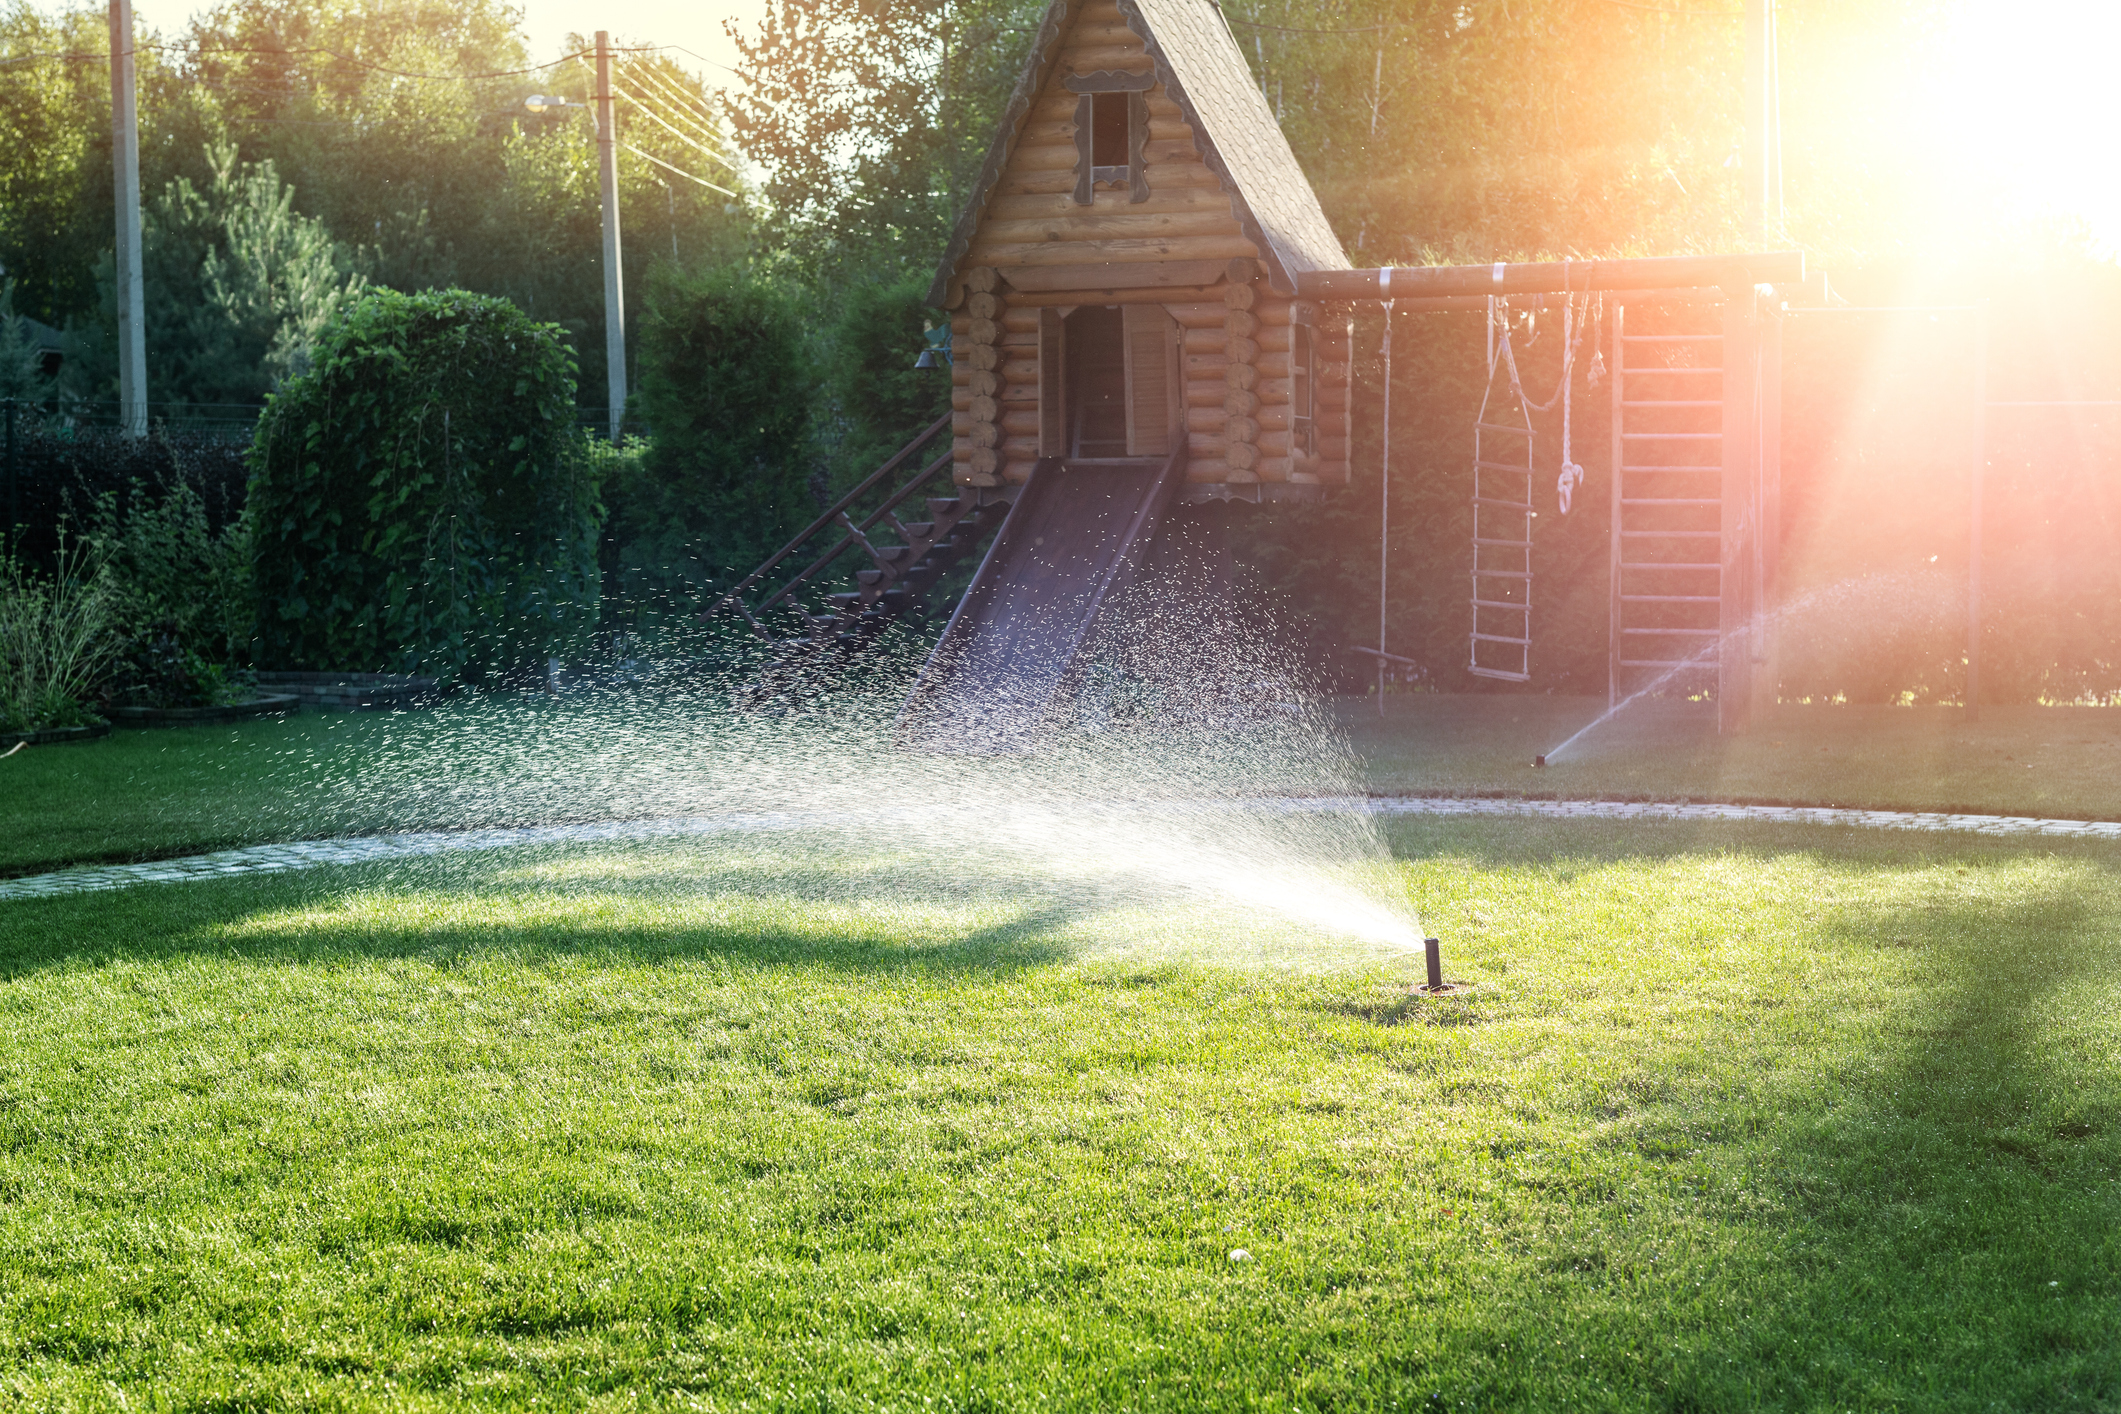
Step 5 — Water Correctly Through the Establishment Period
New grass seed is more sensitive to moisture than established turf. The establishment period — from seeding until the lawn is fully rooted and mow-ready — requires a specific watering approach. Getting this wrong is one of the most common reasons a lawn renovation fails at the finish line. Even a well-executed lawn fix can unravel in the first two weeks if the seedbed dries out repeatedly.
The First Two to Three Weeks: Keep the Seedbed Moist
Water lightly and frequently — two to three times per day if needed — to keep the top half-inch of soil consistently moist. Don’t let the seedbed dry out between waterings; exposed seed and germinating seedlings dry out quickly in sun and wind. Don’t overwater either — standing water drowns emerging seedlings.
After Germination: Shift to Deeper, Less Frequent Watering
Once grass is visibly sprouting and reaches about an inch tall, shift to deeper, less frequent watering — once per day or every other day, long enough to wet the soil 3–4 inches down. This encourages roots to grow downward rather than staying shallow.
After the First Mow: Normal Watering Schedule
Once the lawn is established enough to mow (typically 6–8 weeks after seeding), you can transition to a standard watering schedule for your grass type — generally 1 to 1.5 inches per week, delivered in two or three sessions. For warm season lawns, see the guide on how often to water Bermuda grass for a detailed breakdown of frequency and depth by season.
A simple oscillating sprinkler on a timer works well for keeping a consistent watering schedule during establishment without having to remember to run it manually.
Step 6 — Mow, Fertilize, and Protect the New Lawn
The renovation isn’t complete the moment grass appears. New turf needs careful management for the first season to build the root depth and density that makes it durable long-term. This final phase is what separates a lawn fix that holds from one that deteriorates again by midsummer.
First Mow Timing
Wait until the new grass reaches 3 to 4 inches before mowing for the first time. Mowing too early — when roots are still shallow — can pull seedlings out of the ground. Use a sharp blade and remove no more than one-third of the grass height in a single pass (this is the “one-third rule”).
First Fertilizer Application
Apply a balanced lawn fertilizer approximately 6–8 weeks after seeding, once the lawn is established enough to handle it. Fertilizing too early stresses seedlings. A nitrogen-forward fertilizer at this stage supports shoot growth and helps the lawn fill in. Follow the bag rate for new lawns.
Weed Control
Do not apply any pre-emergent or post-emergent herbicide to a newly seeded lawn until it has been mowed at least two to three times. Most herbicides — including popular weed and feed products — will damage or kill grass seedlings. Weeds that appear in the first season of a new lawn are normal; handle them once the turf is established enough to tolerate treatment.
What a Recovered Lawn Looks Like — and What Comes Next
The difference between a lawn renovation that works and one that doesn’t almost always comes down to sequencing. Homeowners who test before amending, prepare before seeding, and wait before fertilizing get results. Those who skip ahead don’t. Follow the steps in order, match your timing to your grass type, and a struggling lawn can look dramatically different within a single season.
By the end of the first growing season, a properly renovated lawn should have consistent ground coverage, no large bare patches, and a root system deep enough to survive normal drought stress. Full density and uniformity often takes two full seasons — but the goal of this process is to get out of renovation mode and into maintenance mode. From there, the job shifts to standard seasonal care: regular fertilizing, appropriate mowing height, and annual overseeding for any thin spots. That’s the reward for doing the lawn fix correctly the first time.